Here are the steps to create an account:
Step 1: Log in to Dax Optimizer
Here are the steps to follow to log in to Dax Optimizer:
- Go to app.daxoptimizer.com.
- Click Sign In/Register.
Here is the screen you will see:
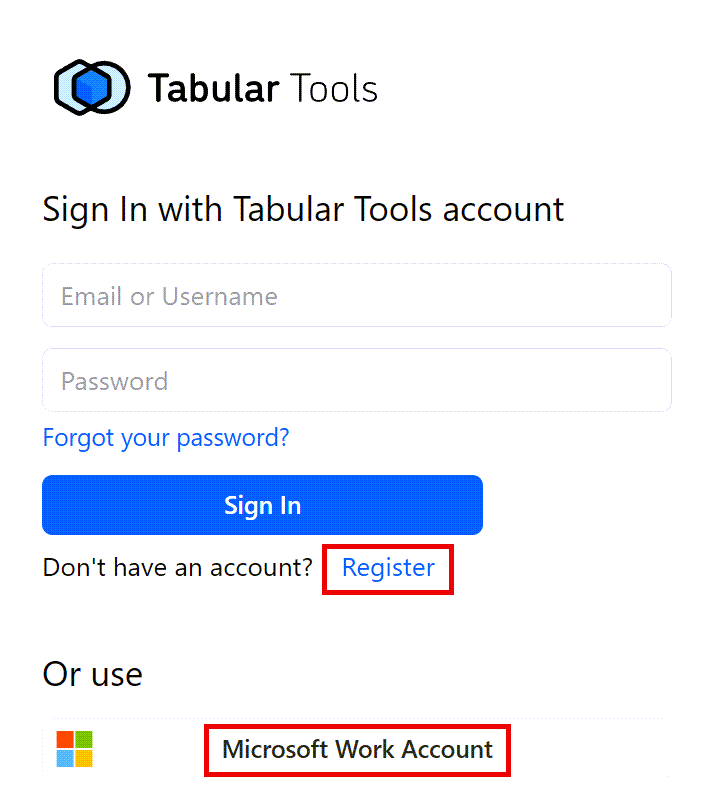
Now, select a login type.
Step 2: Choose a login type
Choose between logging in via Tabular Tools or Microsoft Work account.
NOTE: We suggest choosing the Microsoft Work account using Microsoft Entra ID authentication (formerly known as Azure Active Directory) if you always use the same “Work or School” account - like the one you use for Power BI, for example.
You may prefer a Tabular Tools account, instead, if you work as a consultant for different customers and change work accounts often.
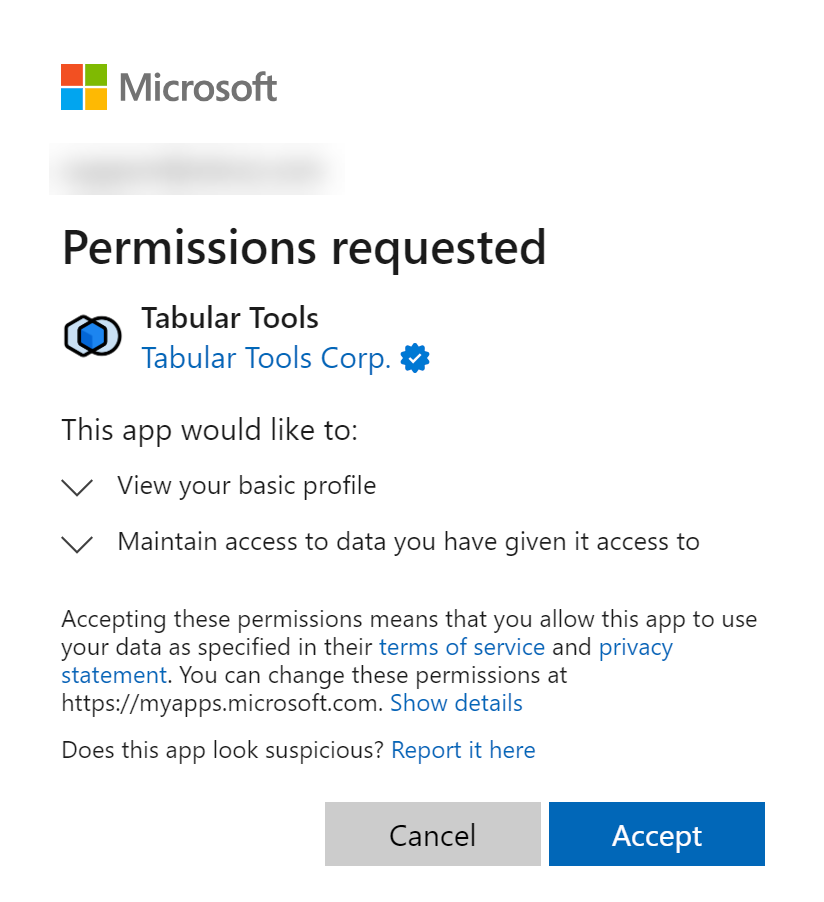
How to log in via a Microsoft Work account
Here is how to log in using your “Work or School” account:
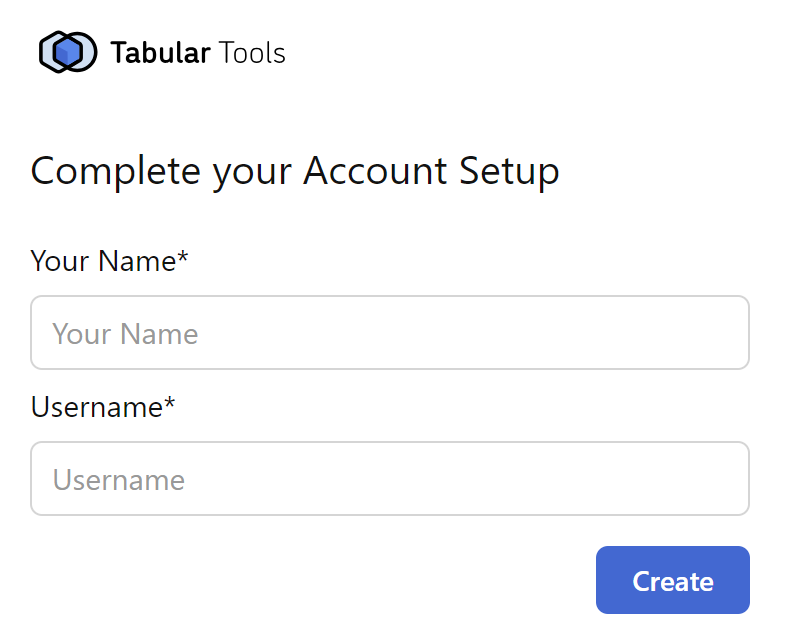
- Choose the Microsoft Work Account option, then click on Accept to continue.
- Choose the name and the username for your account. The username can only have numbers and letters (no special characters), and it must be unique in the system. Click Create to continue.
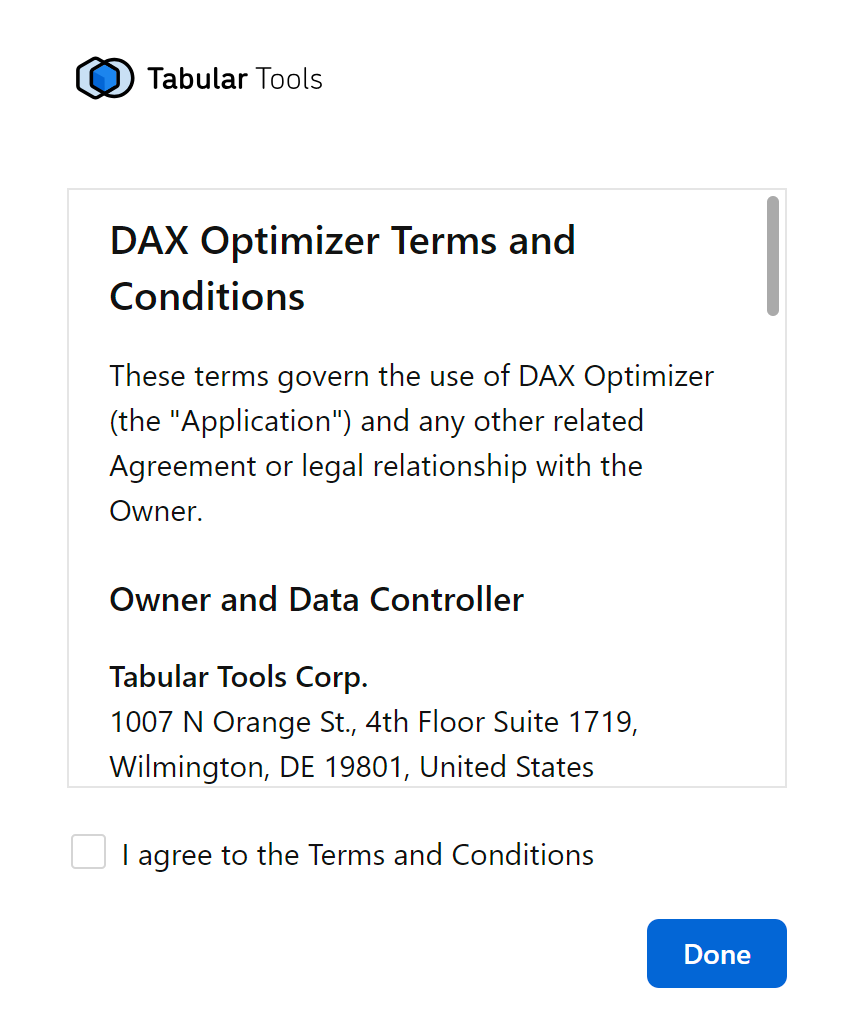
- Read the Terms of Service, check the box to agree to the terms and conditions, and click Done to complete the process.
How to log in via a Tabular Tools account
To log in via a Tabular Tools account you have two options:
- Option 1: you already have a Tabular Tools account. In this case, insert the email and password of your Tabular Tools account.
- Option 2: you don’t have a Tabular Tools account. In this case, click on register.
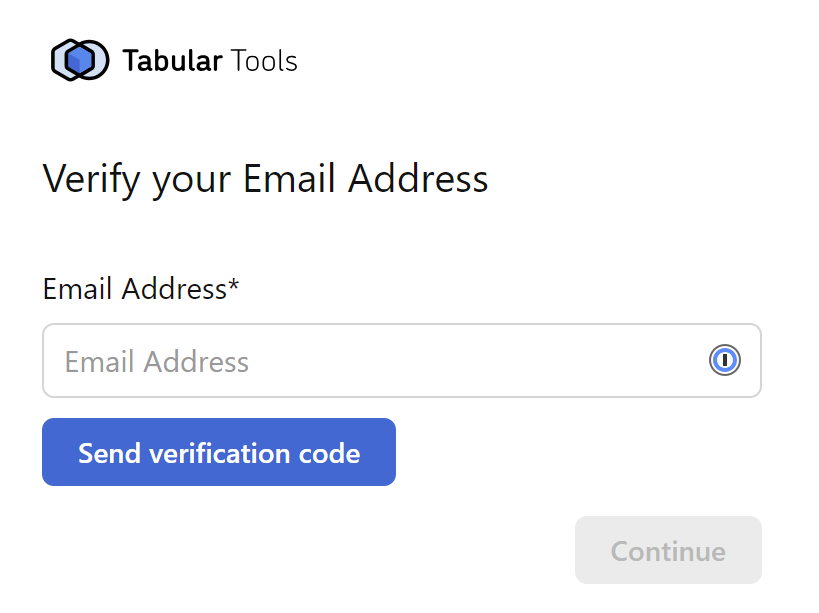
Here are the steps to complete your Tabular Tools account registration:
- Write your email address and click Send verification code.
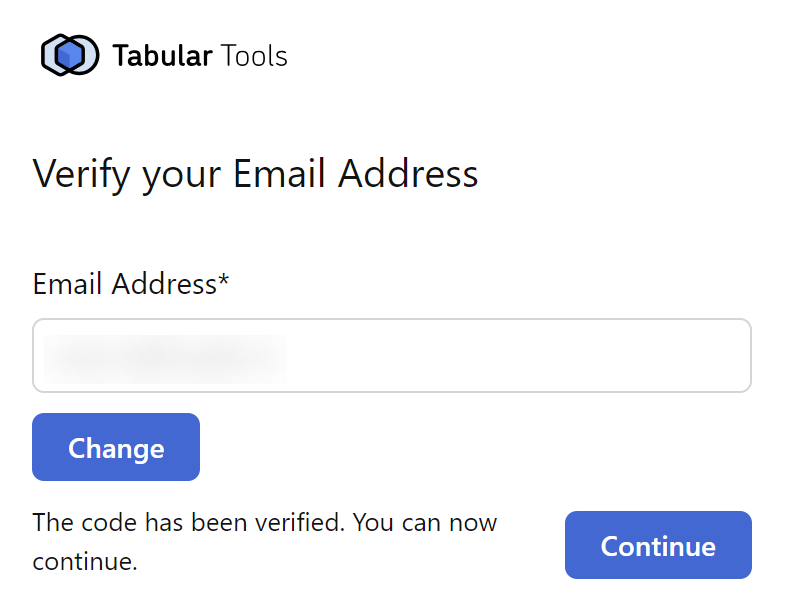
- Copy and paste the verification code you received by email and click Verify code.

- Once the email verification process is completed, click Continue to move forward. Click Change only if you want to change the email for your account.
- Choose the name, the username, and the password. The username can only have letters and numbers (no special characters), and it must be unique in the system. Complete the form and click Create.

- Read the Terms of Service, check the box to agree to the terms and conditions, and click Continue to complete the process.
Step 3: Choose the default region to store your data
Regardless of the type of login you have chosen, after completing the process you will be asked to select a default region to store your data:
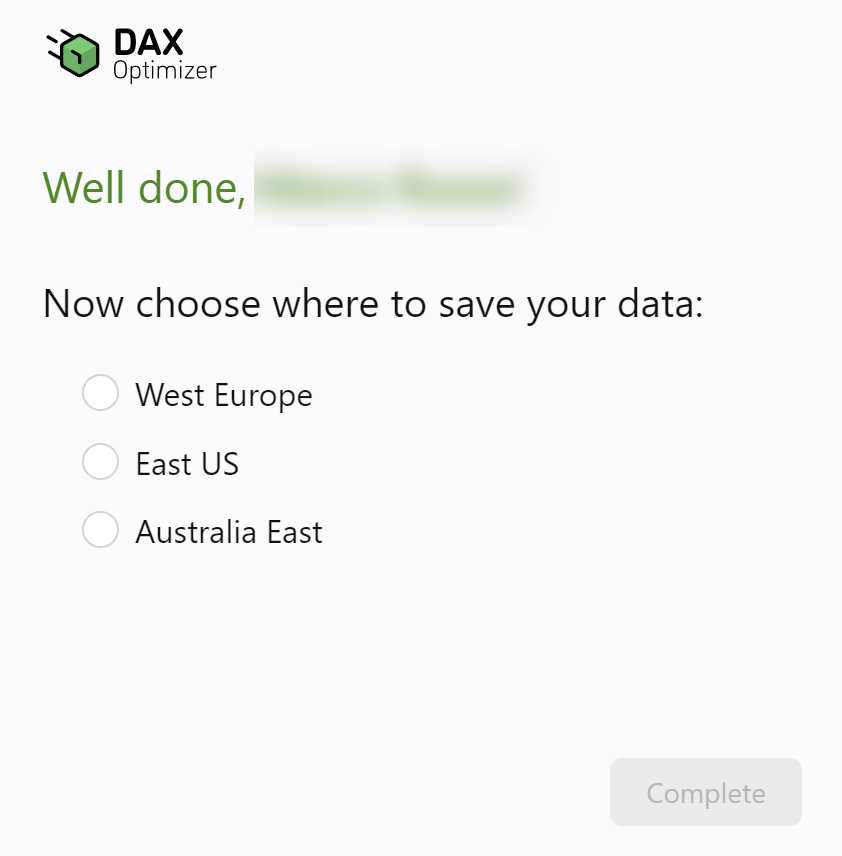
Choose the default region you prefer to save your data (you can change the region later).
Your account is ready: you can now buy a license.